Showing posts with label Health Wise. Show all posts

12 August 2012

Daniel's 4th Birthday and cake recipes


On Wednesday, the first of August, we celebrated little Daniel’s 4th birthday!  Daniel is Smiley. He just has a smile that reaches his eyes and warms your heart!


We planned his birthday party for following Saturday and decided to just have fun on the day of his birthday, allowing the little ones to decorate cupcakes and play with bubbles on the beautiful sunny day!  


Heidi-Mari used a Lindt chocolate cake recipe for the cupcakes.  


Ingredients:
1 cup plus 1/2 tablespoon (120 g) butter, softened
1/3 cup (40 g) castor sugar
Pinch of salt
6 eggs, separated
3/4 cup plus 2 tablespoons (180 g) castor sugar
3/4 cup plus 2 tablespoons (130 g) flour, sifted (170g spelt flour)
Method
Preheat oven of 180°C. Grease baking pans and line the bottoms with parchment paper.
Melt the chocolate (in a double boiler or over boiling water, off the heat - we don’t use a microwave) and set aside.
Cream butter, castor sugar, and salt.
Add the egg yolks one at a time to the butter mixture.
Add the melted chocolate.
Whip the egg whites, gradually adding the sugar and beating until shiny and just starting to make stiff picks - be careful not to over beat, then it will be to dry.
Carefully fold 1/3 of the egg whites into the chocolate mixture.
Fold in the remaining egg whites and sifted flour.
Pour the batter into the baking pans (if baking a cake) and bake approximately 40 minutes. Baking time will decrease if using 2 cake pans. Check at 30 minutes. Cakes are done when a toothpick inserted in the centre of the cake comes out clean. 
Or pour the batter into muffin pans lined with paper cups and bake for approximately 12 minutes. 
You may have noticed, this isn’t a healthy birthday cake. Its not diary, wheat AND sugar free, only wheat free. We tried numerous times to bake a cake with honey, with no success.  The enzymes in the honey just don’t allow the cake to set.  So we still use sugar in this recipe, the ‘cleanest’ chocolate we can lay our hands on - Lindt, and spelt flour, an ancient flour, not genetically modified like wheat and grown organically with no pesticides. 
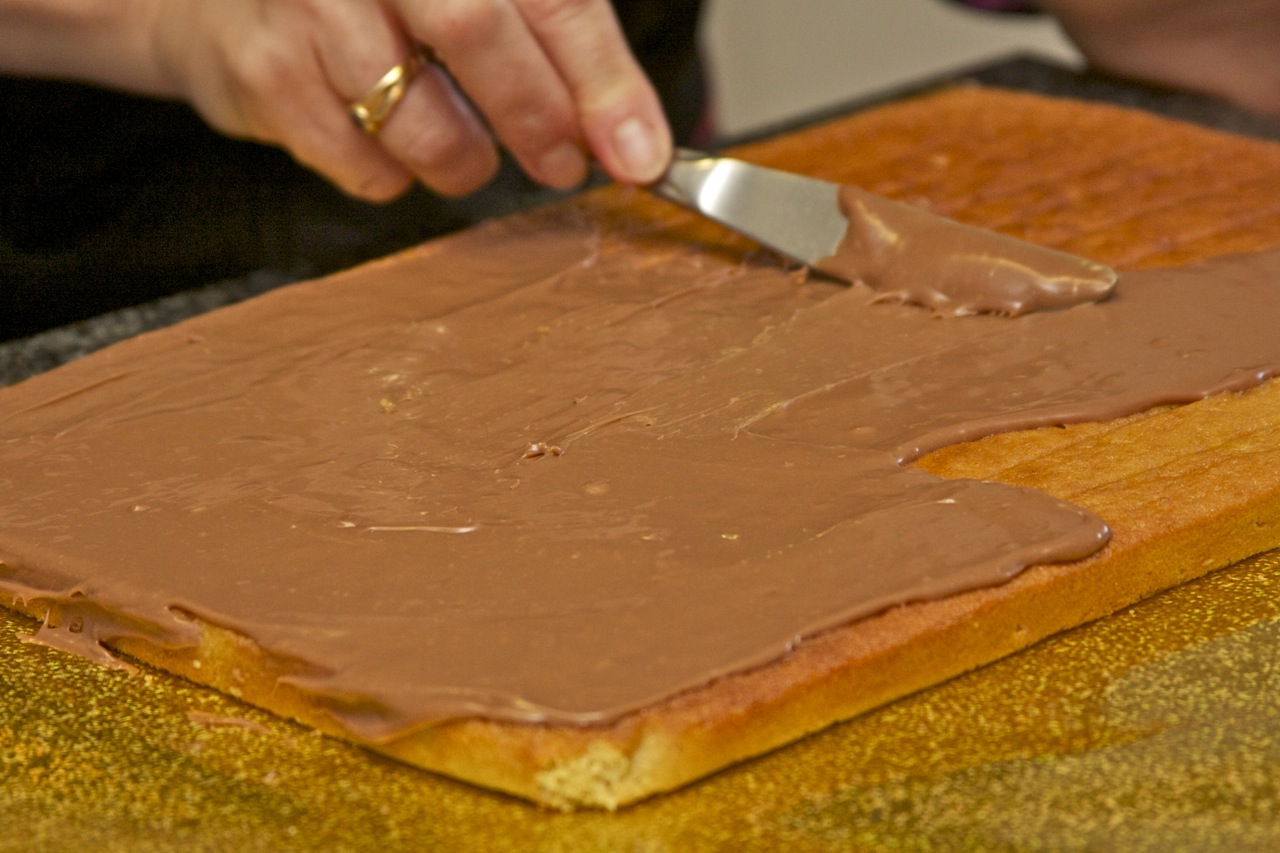
Since Danika and Andrew’s birthday party, we’re not using icing sugar anymore to decorate cakes and cupcakes.  We use the chocolate ganaches from the Lindt workshops we attended for chocolate truffles and fillings for hollow chocolates


It works perfectly to decorate cakes and cupcakes.


Amarula/Vanilla Ganache filling
This ganache was originally for our filling and moldings of chocolate and contains Amarula. But we successfully replaced the Amarula with vanilla for the birthday cake icing.  
500g condensed milk
350 g milk courverture 37% (brown milk chocolate - Lindt)
75 g amarula or 15ml vanilla extract
Melt the chocolate over boiling water (take the boiling water off the heat, let the chocolate gently melt over the water, only stir occasionally and make sure no steam reach the chocolate)
Add the condensed milk
Slowly add the Amarula or vanilla. Mix until well combined.
Vanilla ganache filling
Using vanilla pods or a good vanilla extract will serve to enhance and give depth to the white chocolate base.
450 g white courverture 36% (white milk chocolate - Lindt)
200 g glucose syrup
200 g cream 35% fat
Vanilla extract
Simmer the, cream, glucose and the vanilla extract.
Pour the cream over the white milk chocolate and allow to stand for 1 min, then mix from the core to form a smooth shinny ganache.
You might ask, why using these ganaches, instead of icing sugar to decorate the cakes, while it still contains sugar.  We noticed the icing sugar used to decorate the cakes has a worse effect on the energy levels (hyperactivity) and side effects on children than the high quality chocolate. Years ago when CJ turned two years old, I tried a ‘Healthy party’. No sweets, only sandwiches with coloured fillings, coloured boiled eggs, etc.  The effect due to the coloring was even worse than the effect of the sugar. Not to mention, half of the children was disgusted with the menu - “where were the party stuff?”.  A party will always need the sweet stuff, and we just have to work with that.
When you plan a party you have to make peace that your children is going to take in sugar.  You need to boost their immune system before hand, supplement them with enzymes to digest the wrong stuff at the time of the party and will need to give them antioxidants after the party.  Then you need to try and get the best quality of cake and decorating ingredients where possible. For this reason we replace low quality icing sugar with all the bleaching, refining and accompanying colorants, with an excellent quality of sugar like Lindt chocolate.  
We also restrict colourings to the minimum. 


On Wednesday I made the huge mistake to buy thousand and thousands and all kinds of interesting decorating stars and circles from the decorating section of our local grocery store to decorate the cupcakes. 


The next 48 hours was a total disaster! We usually use normal sweets like smarties, astros and jelly tots to decorate cakes, this was the first time I bought these special decorating stuff.  It must have been the colorants (which clearly have of a much higher concentration of colorants than in normal sweets) which caused my children to go totally wild for 48 hours.  Their emotions were totally out of control.  They would cry for everything, got angry for nothing, and not be able to focus for any length of time! Never before did I experience this.  
This just confirmed to me, that when you need to use sugar make sure you use the best quality available. Stay away from the local baking supply store!  I noticed the other day, the products available in the baking section, very seldom have an ingredient lists. And the boxes with ready bake cake mixes, contains more preservatives, flavorings and colorants than actual flour.  
Bake from scratch and choose your ingredients carefully! 

For Saturday’s birthday cake I was blessed with Heidi-Mari and CJ taking full responsibility to bake and decorate the cake.  Danika and Daniel chose the theme.  Heidi-Mari used our traditional Basic French Sponge Cake for the cake, using spelt flour and NO baking soda and they used the ganaches to decorate the cake.  Since most of the cake was decorated with the brown ganache (chocolate which contains no colorants), we minimized the use of colorants.
For the first time ever I could go to bed at 10pm the evening before a child’s birthday party.  CJ and Heidi-Mari were still decorating the cake, but I knew they would create a show piece after observing and assisting me in decorating at least 50 cakes over the past 18 years. And they did!

Thank you CJ and Heidi-Mari for making Daniel’s 4th birthday a memory making event!


With love
Linnie


17 July 2012

So, What's Wrong with a C-Section?


As many of you may know, I’m passionate about having babies, raising babies and children as close as possible to how God intend it to do be.
Some time ago I wrote two postings on birth, additionally to my children’s birth stories -  ‘Are we still Designed to give Natural Birth?’ and ‘From a Perfect Normal Birth to a Caesarian in a Few Simple Steps.’
Since then I had much opposition and misunderstanding from friends, family and acquaintances on being very outspoken and adamant about natural births, in a normal, not-life-threatening-pregnancy, I longed to write an extra posting following my posting on Birth issues on “So, what is wrong with a C-section.” But time for proper research and writing was inadequate.
Since then my husband, Christo, who blogs at Natural Medicine Talk, started a Facebook page, Natural Health Discussion and following a series of discussions on the risks mothers run in trusting the medical profession blindly, he is busy writing a series on “How to have a healthy and natural pregnancy in spite of your gynecologist.”
And now Part 3 has been published: So what is wrong with a C-Section

As I was talking to a few ladies this morning, we have a healthy, young, mutual friend who is due to give birth any day now, I realized again how uninformed young women are of the risks and dangers of a C-section. All they hear is the benefits of a C-section. How much easier and convenient it is during a time when, as they observed, the mother is hormonally, emotionally and physically exhausted and just can’t be pregnant one day longer than necessary! 
They were shocked when I explained to them just some common risks like:
  • The painful weeks after the birth, due to a major surgical procedure. So painful, you need schedule 6 & 7 drugs to cope with the pain, while trying to take care of a newborn baby;
  • The Possible organ failure in baby due to the schedule 6 & 7 drugs, the mother receive afterwards for her major surgical procedure and which enter the baby through nursing. Would you like to give your newborn baby a scheduled 6 & 7 drug?
Did you now:
  • Breastfeeding is prone to fail due to the sedative drugs, given to the mother while performing the C-section, and the separation of baby and mother, while they are taking care of the mother after baby has been taken out;
  • Your baby has an increased risk of constipation and colic, due to the lack of friendly bacteria ingested by baby while being born through the birth canal. Trust me, it isn’t fun to see a constipated baby.
And then there is increased risk of postpartum bleeding and depression and the possible decrease in brain development of baby’s born pre-term...
But read more for yourself, here


Please Note:  The aim of this posting is to inform young, first time mothers who only hear the positive side of a C-section. Not at all to condemn or judge women who had a lifesaving, absolute emergency C-section.
With much love
Linnie

12 February 2012

Health Talk Webinar


Since September last year my Husband, a Clinical Nutritionist and Health Shop Owner, have been presenting Health Talks once a month at Eirene Health Shop, our Health Shop, in Durbanville. Over the months many of our clients around South Africa, requested the talks online.


So, after a lot of ‘behind the scenes’ sweat, we are happy to announce that we will be hosting our first Webinar on Monday Evening, 13 February, at 7pm live from Eirene Health Shop.
The seminar will be on “How to Maintain your S3xual Health - Naturally”


Through this Webinar you will learn how to:
Improve Libido
Avoid PMS
Correct hormone related depression
Have a healthy Prostate
Prevent Breast Cancer
Eliminate Dryness and Pain
Balance Hormones
Eradicate Erectile Disfunction
Enjoy your intimate life to the full

We have created a Registration form via which you can register for the seminar and you can log in just before 7pm - Click here to register for the Webinar.
You will receive a Registration Confirmation by e-mail and the link to login 15minutes before 7pm to give you able time to log in.
Please take note: On the Registration form for the live Webinar you will also find a link to check your computer’s ability to view this Webinar. If you copy, paste the link it will check if you have all the plug-ins to run a Webinar.

We hope you can join us for this live talk.

Much love
Linnie

26 October 2011

Wheat Free, Crispy Apple Tart made with Homemade Wheat Free Puff Pastry Dough.


Yes, it is possible.

It is possible to make a successful, homemade wheat free puff pastry dough, with Spelt flour.  Classic puff pastry dough scares people because it sounds complicated.  Yes, to make it perfectly takes some practice, but if you follow a few do’s and don’ts, you should be able to make dramatic puff pastry the first time.
There is so much you can do with a classic puff pastry dough.  From croissants, to fruit tarts, to pies and snacks.
Over the weekend we made a Crispy Apple Tart with the puff pastry dough, and even managed to keep a part of the dough for breakfast croissants. 

This tart manages to taste intensely of butter and apples at the same time.  You will also feel a delightful delicate crunch when you bite into a piece.
Ingredients for Crispy Apple Tart
Makes one 11 by 14 inch or 28 by 35 cm tart
1 recipe puff pastry dough, 4 turns instead of the traditional six
4 large apples, such as Golden Delicious, Macintosh or local tart varieties for baking, but not Granny Smiths
3 tablespoons sugar
½ cup butter, melted
Classic Puff Pastry Dough
Tips on a classic Puff Pastry Dough (The same for spelt or all purpose flour):
  • Remember, you’re basically enclosing a packet of butter in some pastry dough and then rolling it out and folding it over itself to create layers. 
  • Keep the dough cold or the butter it contains will melt and the integrity of the layers will be lost. Before baking, trim off the edges.  
  • The edges are likely to be crimped and can inhibit the pastry’s rise. 
  • Once you’ve rolled out the pastry dough and cut it to the size and shape you want, stick the whole sheet pan in the freezer for 15 minutes just before baking. The colder the dough and the greater the difference in temperature between the dough and the oven, the more dramatic the rise will be.
  • When baking puff pastry dough, always start with high heat, at least 425 degrees F or 220 degrees C, to get the most rise.  If the dough isn’t cooked through even though it’s puffed and golden brown, turn down the oven to 300 degrees F or 150 degrees C so the pastry continues to cook on the inside without browning any more. 
I’ve included a hand made puff pastry dough and a recipe made in the Panasonic Bread Machine - the one piece of equipment in my home I can’t raise a wheat sensitive family of ten, without! 

The hand made recipe is somewhat unorthodox because it calls for working the basic dough that you use to enclose the butter.  This is heresy to anyone trained in the classic method in which the dough is worked as little as possible, but the results are dramatically better.  The only downside is that the initial dough has to rest overnight before you can get to the next step.
Ingredients for Hand made Dough (without yeast)
Makes 1 ¾ pounds / 800g dough
2 cups all-purpose flour or 2 ⅔ cups white spelt flour
½ cup water
3 tablespoons vegetable oil
1 teaspoon salt
1 pound butter
Combine the flour, water, oil and salt by hand on a work surface or in a stand mixer or food processor.  Mix until they come together in a smooth, homogeneous mass. Don’t hesitate to knead the mixture to smooth it out.  Form the dough into a squarish disk and score the top deeply with a knife, to help the gluten relax.  Wrap tightly in plastic wrap and let rest overnight in the refrigerator.
Bread machine Dough (with yeast)
2 ½ t yeast
550g white spelt flour (400 g all purpose flour)
1 ½ t salt
1 ½ Tsp rice milk powder (normal milk powder will also work)
1 ½ Tsp rapandura sugar
1 egg
30g butter
215 ml water
Add ingredients in the bread machine in the same sequence as given in recipe.
Choice of “select” - basic
Choice of “option” - dough (2hours 20min)
Press “start.
When dough is finished, wrap in plastic wrap and allow to cool and rest in refrigerator for about an hour.
The butter should not be too cold, it will crack when you roll it; and not too warm, it will ooze out between the layers.  It should have the same consistency as the dough itself.  
Cut a ¼ pound / 125g butter into thin pieces and lay them next to each other between two layers of baking paper.

Roll the butter so the pieces become one. Don’t thin out the butter.


Put in freezer for 30 min to harden.

Flour the work surface and put the dough on it.  Roll out in a rectangle about 13 by 17 inches / 30 by 45cm. (I didn’t us all the dough for the tart and saved about 200g for the croissants.)  Place the butter on the one half of the rectangular dough.

Fold over the flap, tucking excess dough into the folds so the butter is completely enclosed.  


Fold the rectangle into thirds as though it was a letter, starting with the narrow end, fold the bottom third down,


and fold the opposite end up, to form a neat parcel of dough.  


Hammer gently on top of the packet of dough.


Turn the dough so that the large single fold, like the spine of a book, is on your left, and fold it in the same way.  If the dough is difficult to roll, refrigerate for 30 minutes.
Wrap in plastic wrap and put in refrigerator for an hour to rest.
Continue in this way until you have given the pasty 4 turns in total.
Method for Crispy Apple Tart
Preheat the oven to 425 degrees F or 220 degrees C.
Sprinkle cold water on a sheet pan to keep the bottom of the tart from burning.
Roll the dough into a 12 by 15 inch / 30 by 40 cm  rectangle and transfer it to the prepared sheet pan. Trim the edges of the rectangle so it measures 11 by 14 inches / 28 by 35 cm and dock it (poke it with holes) to keep it from puffing up in the oven.


Peel, halve and core the apples.  Cut the apple halves into thin slices.


Arrange the apple slices in rows along the length of the pastry, overlapping the slices so that each one cover about half of the one before it and changing direction with each row. 


Brush evenly with the melted butter.


Sprinkle the tart with the sugar.


Bake for about 50 minutes, or until the edges are a deep golden brown.  Start checking the tart after 20 minutes to make sure it isn’t puffing up and forcing off the apples.  If it is puffing, poke the puffed part with the tip of a paring knife to deflate it and use the tip of the knife to gently rearrange any slices that have moved.


Let cool on the sheet pan for a minute and then, with a long metal spatula, scrape under the tart to loosen it before you remove the tart from the sheet pan - it always sticks and usually burns a little on the bottom.


Cut into rectangles and serve.


I enter this delicious tea snack in Heidi-Mari's Fortnightly Baking Challenge


This fortnightly theme is Snazzy Snacks and you can be the proud winner of the Australian Women's Weekly Snazzy Snacks Recipe book!
Hop over to Heidi-Mari's blog and check out the mouth watering snacks.  Maybe you can enter you favourite snack too!

Bon appetite
Linnie

Blog Widget by LinkWithin